Since 2010 I started writing about OpenStreetMap and its features. Since then I have never stopped using it, with renovated satisfaction, but I couldn't find the time or the will to keep you updated on the great potentiality of this free cartography.
With this article, I'd like to start again writing about OSM and in particular its variation for MTB. We will see how to install OpenMTBmap on your PC and on GPS devices by Garmin.
OpenMTBmap: what are they?
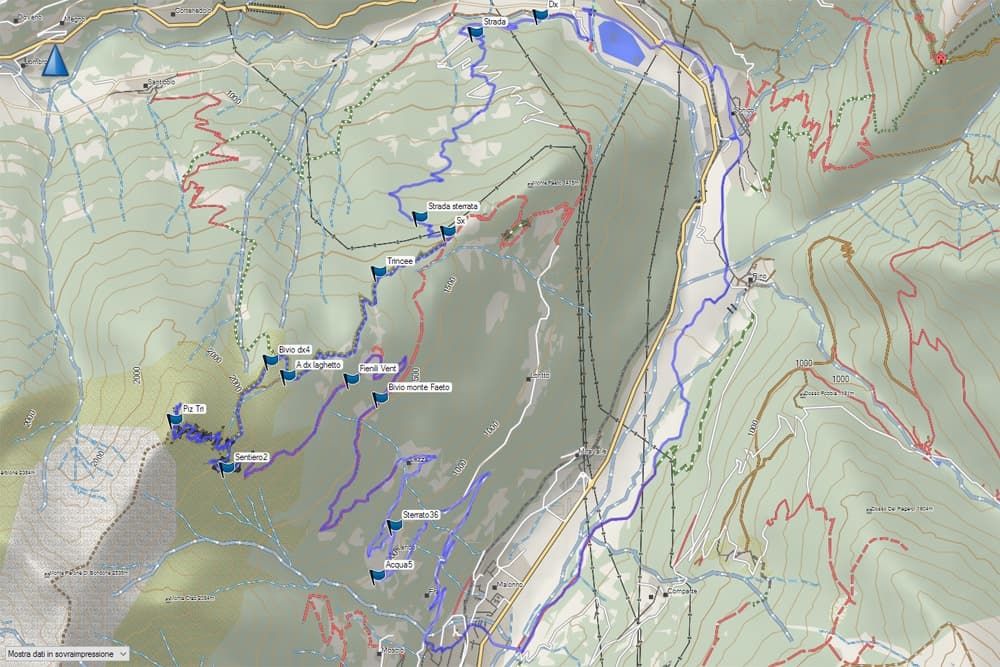
Open MTB maps are free maps for mountain bike and hiking based on OSM data. The main creator of this project is Felix Hartmann, Austrian from Innsbruck who manages the website and has recently improved the Velomap maps for road bikes.
The main features of what Hartmann states are the most popular mountain bikes maps in the world are:
- free download of the maps of (almost) all the world with files updates based on OSM every 6-7 days;
- 6 different layout with five high contrast for the different Garmin GPS and one for desktop use;
- detailed type of way/street and clear differentiation between asphalt, forest, single trail... with details and difficulty level (the author improved the scaling MTB:scale).
- contour lines integrated nearly worldwide.
As told before, these maps are free if you download them by individual country/area but it's possible to contribute to the development of the website (updating the files for download, tutorials, video, forum...) with a donation of 20€ per year (from the second year it decreases) or 100€ for a lifelong access. With this contribution, you will be able to ask for support in the comments, download the map of Europe updated once a month.
For Mac OSx users the maps are not free because they require a particular conversion.
OpenMTBmap: where to find the maps
Now that you know what this is about, let's see where to download OpenMTBmap maps. Firstly you have to access the download page of OpenMTBmap website (if you have to download the Mac OSX version the page is different: you can find it in the main menu) and choose the map of the nation/area you want. As told before, you find many countries, but not all of them: for our recent trip to South Africa we didn't find the map of Swaziland (the first idea was to pass through it but we didn't manage) while South Africa and Lesotho were really useful!
I mostly use the Alps map or the Italian one. My advice: download again the maps and install them when you begin to pedal again in order to have cartography always updated. The community contribution, in countries where the MTB culture is very important and gives a great impulse to the development of this cartography.
Now we know where to download the maps OpenMTBmap. We have to understand how we want to use them. There are usually two possibilities:
- on your PC thanks to cartographic software specific for planning and tracking future routes or viewing routes realized on the field;
- on GPS devices for the navigation during your excursions.
Let's see how to install the maps on your PC and then on your GPS device.
How to install the maps on your PC
The first possible use of these maps is on "desktop", so I'll try to explain how to use OpenMTBmap maps on PC (Windows OS, the one I currently use).
In order to view OpenMTBmap maps, you will need specific cartographic software.
I can suggest two I usually use:
- BaseCamp, by Garmin. You can download it here, and if you want to know more about it you can read the Guide to BaseCamp;
- Qlandkarte recently changed to Qmapshack.
If you own a Garmin GPS device I suggest to use BaseCamp because it will be easier to set it up, but I personally like Qlandkarte and I use it for altimetric data and to modify the routes.
After installing the software you prefer (nobody will stop you from installing both) here are the steps o follow in order to install the maps OpenMTBmap on PC:
- download the maps of the country you want for free or after a donation;
- start the installation by clicking on the file you just downloaded. For this example, I will refer to the cartography of the Alps, so the file will be mtbalps.exe (at the moment I'm writing it weights 1,2GB!). In general, the file name is mtbNAMECOUNTRY.exe;
- You will probably be asked whether "You want to allow this app to modify your PC?". By selecting YES you will start the installation process ;
- Click on Next to start;

- read and accept the "Terms and Conditions";

- choose if you want to integrate contourlines or to install a separate contourlines map. I 100% suggest to integrate contourlines, while the second possibility is pretty subjective, due to the use of the maps;

- choose the layout for PC, so the one named Mapsource-Qlandkarte_GT;

- choose the folder in which to install the maps. You can leave the default one (Garmin/openmtbmap/NAMECOUNTRY) or choose a different path: remember where you install the maps and use always the same path when installing updates;

- click on Next and Install. A progress bar will appear: wait until the procedure is completed.

- you have correctly installed OpenMTBmap maps on your PC: you can click on Finish and start using them.

If you chose to use BaseCamp you will have the option "openmtbmap_alps_DD.MM.YYYY" under the menu "Maps" at the top of the main window of the software. As you can see from the picture below I have installed many of them! The day is the update day. By flagging the map, it will be loaded and you can start using it.
 By flagging the map, it will be loaded and you can start using it.
To load the installed map on Qlandkarte just start the software and from "File" select "Open Map".

Find the folder where you installed the map and select the file mapsetc.tdb

Click on Open and choose the file mapsetc_mdr.img
 Now you will have your OpenMTBmap on Qlandkarte too!
How to install maps on a GPS device
Ok, now you have your maps on PC but for your MTB trips, you need OpenMTBmap maps on your GPS device. I use a Garmin Montana 600 and I will show you how to install them on it. The procedure is no different for other devices too.
How to modify the OpenMTBmap layout
Firstly, if you remember, during the installation on PC we selected the layout specific for that device. The same layout is not specific for a 4" screen or smaller, so before transferring the files on a microSD into the device I suggest you to modify the map layout.
To do so, you need to enter the folder where you installed the map and find the file openmtbmap_alps_change_layout.exe
 Run the application by clicking on the file and you will enter the previous setup: here you will have the possibility to choose among the available layouts: Classic - Thin - Wide - Easy - Hiking.
In this setup screen, you can read suggestions about the best layout for some Garmin GPS devices. Actually, the best thing to do is try and decide for your personal use and experience. I personally like the "Wide" layout. Remember, when you are done sending the map to the device, to set the layout back to the PC one: Mapsource-Qlandkarte_GT.
How to install the maps on a GPS device with BaseCamp
If you use Garmin BaseCamp it is easy to send your maps to the Garmin device. After having chosen the favorite layout and linked the device to our PC, we can run BaseCamp. From the menu Maps choose the option "Install Maps".

A MapInstall window will open, and you will have to select the device where to send the maps. If you have only one device, without any doubt click on Continue.

Now you will have to select the maps to send to the device. In the following screen you will see:
- a list with all the maps that can be installed/uninstalled;
- the preview of the area covered by the maps;
- a bar showing the free space on your microSD (it changes from green to red depending on the availability).
 If the map is already installed on the device, under the name of the map you will read "already installed" (as in the picture above) but you will update it during the installation.
By clicking on the Advanced/Partial installation you will have the option to select specific areas to be installed into a map. For example, the Alps map is composed of 189 parts. By right-clicking on a single part, you will deselect it, while by left-clicking on it, you will select it.

How to manually install the maps on a GPS device
To proceed with the manual installation of OpenMTBmap on a device you have to run the file create_gmapsupp_img.bat. A window will open, and you can choose the layout (by pressing a number from 0 to 5) and the name of the country/area: in my case, I wrote alps:

By doing this, in the installation folder a gmapsupp.img file has been created. You can copy and paste it into the "Garmin" folder of your device (if you own a Garmin device. Otherwise look for other *.img files and paste it in this folder).
Message "cannot authenticate maps"
As specified on the download page of OpenMTBmaps (the last menu, called "Non Unicode"), if you visualize a message "cannot authenticate maps", and own one of the following devices:
- All Garmin devices from 2016 or later
- Edge 1000
- Epix
- Etrex 20x / 30x (not the "Etrex 30")
- Etrex Touch 25/35
- GPS Maps 64 series
- Montana 610, 680 (not the 600 / 650)
- Oregon 700, 750
- Some new Nuvi devices and some super old ones do not support Unicode. (For example, Garmin Vista C, GPS Maps 60 C).
You will have to download the map in the "Non Unicode" version that you find in the download section, as shown below.


